> ## Documentation Index
> Fetch the complete documentation index at: https://ppio.com/docs/llms.txt
> Use this file to discover all available pages before exploring further.
# CC Switch 接入 PPIO LLM API
 如果你是一名 AI 编程工具的重度用户,大概率经历过这样的场景——
想从官方 Claude 切到性价比更高的第三方模型?你得先翻文档找 API 地址、再手动编辑 `settings.json`,小心翼翼地改 API Key 和模型名。
改完发现格式写错了一行,终端直接报错。好不容易调通了,又想同时用 Codex 和 Gemini CLI 跑同一个项目,于是你不得不在三个工具之间分别配置一遍相同的密钥。
更让人头疼的是成本——不同供应商的 Token 价格差异巨大,但你根本没有一个地方能直观看到「这个月各家到底花了多少钱」。选模型全凭感觉,调配置全靠手抖。
不过,现在这些痛点有一个很好的解决方案——CC Switch。
CC Switch 是一款跨平台桌面应用,专为使用 AI 编程工具的开发者设计。它帮助你统一管理 Claude Code、Claude Desktop、Codex、Gemini CLI、OpenCode、OpenClaw 和 Hermes 等受管应用的配置。即使你是非专业用户,也无需管理繁琐的配置文件,只需在界面上点一下,就能在不同 Agent 工具之间自由切换任意模型了。
CC Switch 目前在 Github 上狂揽 129K 星标,非常受 AI 开发者欢迎。
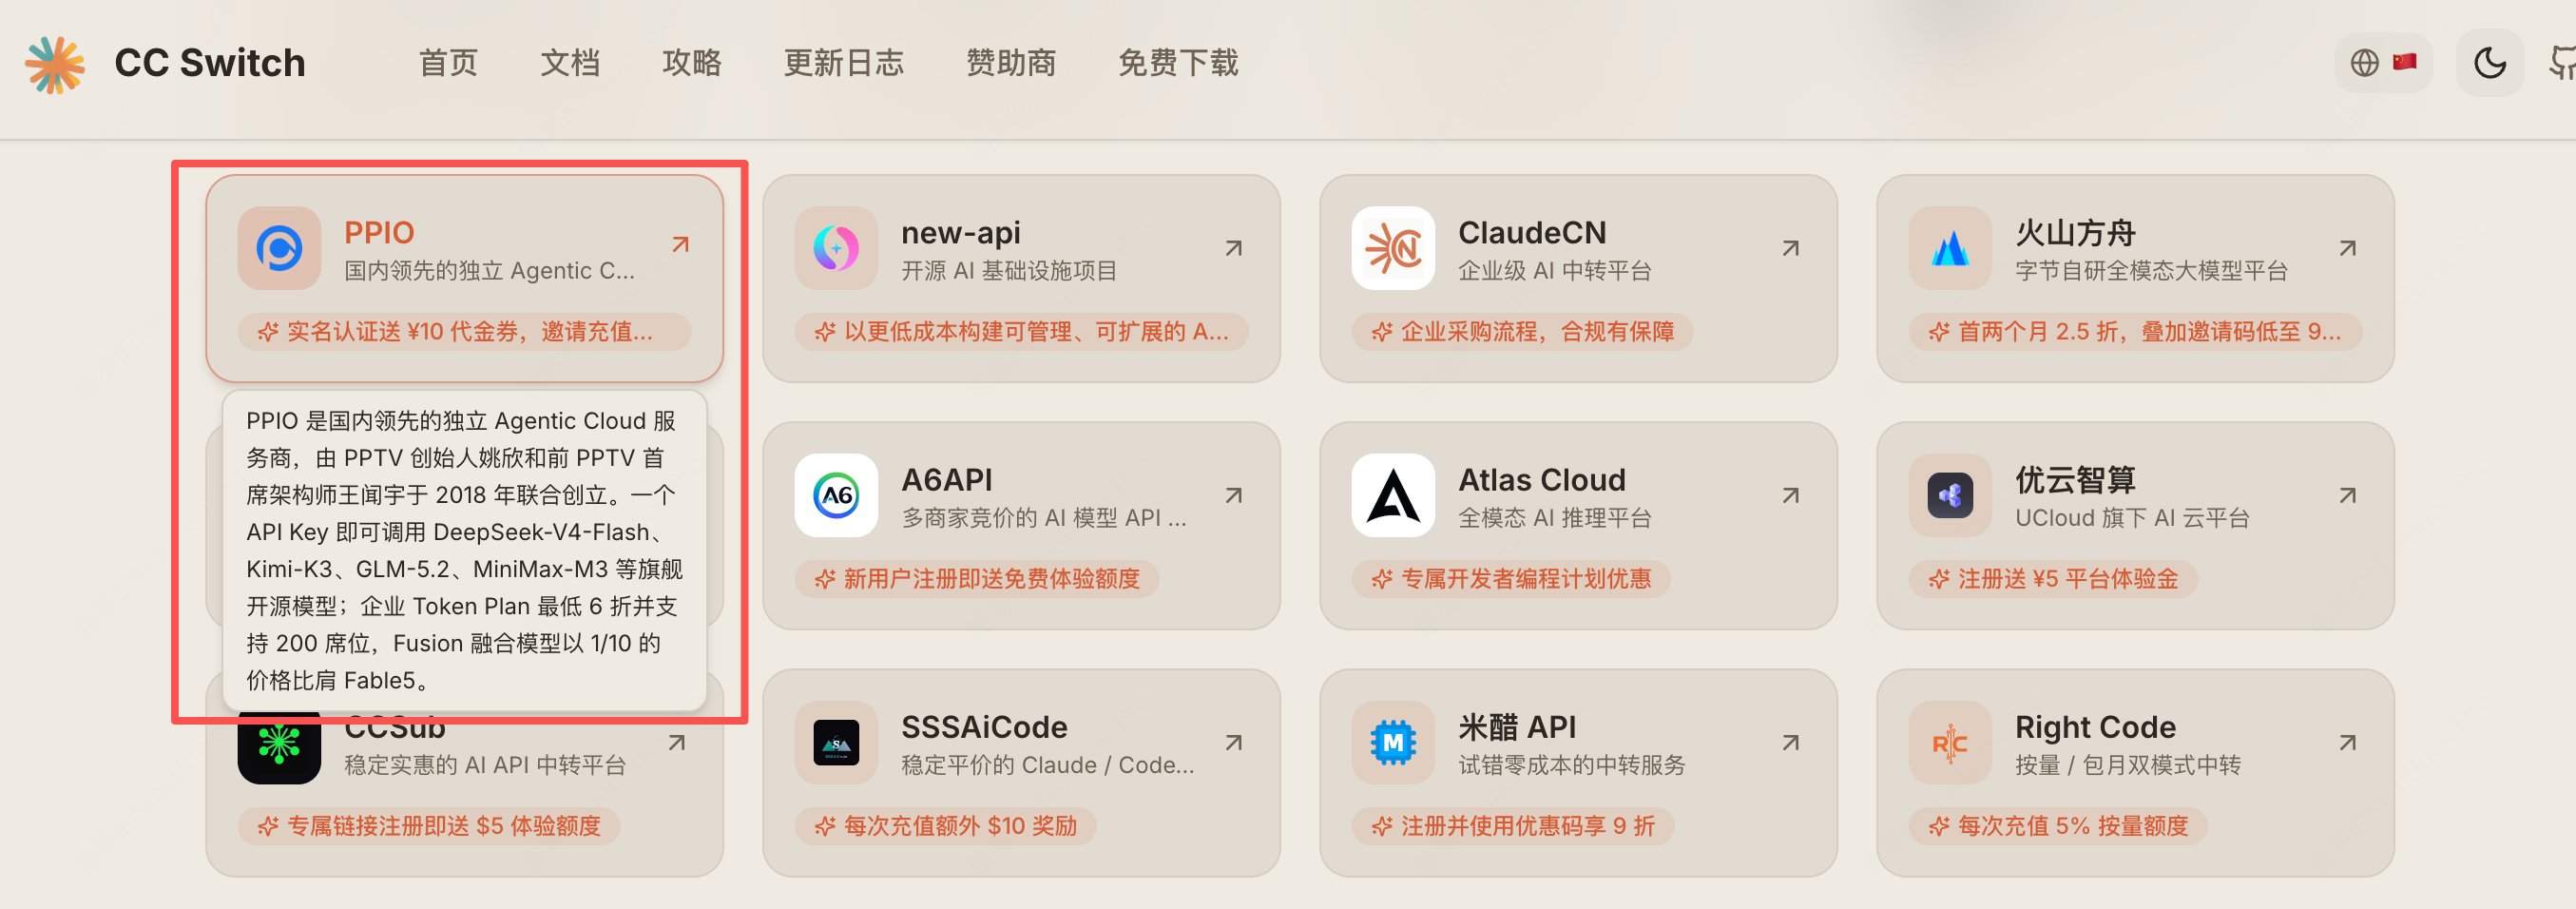
好消息是,CC Switch 已经深度集成 PPIO 的模型服务。你可以直接在其预设供应商页面直接点击 PPIO,在几分钟内完成配置,随时一键切换、随时监控用量。
如果你是一名 AI 编程工具的重度用户,大概率经历过这样的场景——
想从官方 Claude 切到性价比更高的第三方模型?你得先翻文档找 API 地址、再手动编辑 `settings.json`,小心翼翼地改 API Key 和模型名。
改完发现格式写错了一行,终端直接报错。好不容易调通了,又想同时用 Codex 和 Gemini CLI 跑同一个项目,于是你不得不在三个工具之间分别配置一遍相同的密钥。
更让人头疼的是成本——不同供应商的 Token 价格差异巨大,但你根本没有一个地方能直观看到「这个月各家到底花了多少钱」。选模型全凭感觉,调配置全靠手抖。
不过,现在这些痛点有一个很好的解决方案——CC Switch。
CC Switch 是一款跨平台桌面应用,专为使用 AI 编程工具的开发者设计。它帮助你统一管理 Claude Code、Claude Desktop、Codex、Gemini CLI、OpenCode、OpenClaw 和 Hermes 等受管应用的配置。即使你是非专业用户,也无需管理繁琐的配置文件,只需在界面上点一下,就能在不同 Agent 工具之间自由切换任意模型了。
CC Switch 目前在 Github 上狂揽 129K 星标,非常受 AI 开发者欢迎。
好消息是,CC Switch 已经深度集成 PPIO 的模型服务。你可以直接在其预设供应商页面直接点击 PPIO,在几分钟内完成配置,随时一键切换、随时监控用量。
 ## 第一步,获取 PPIO 的 API key
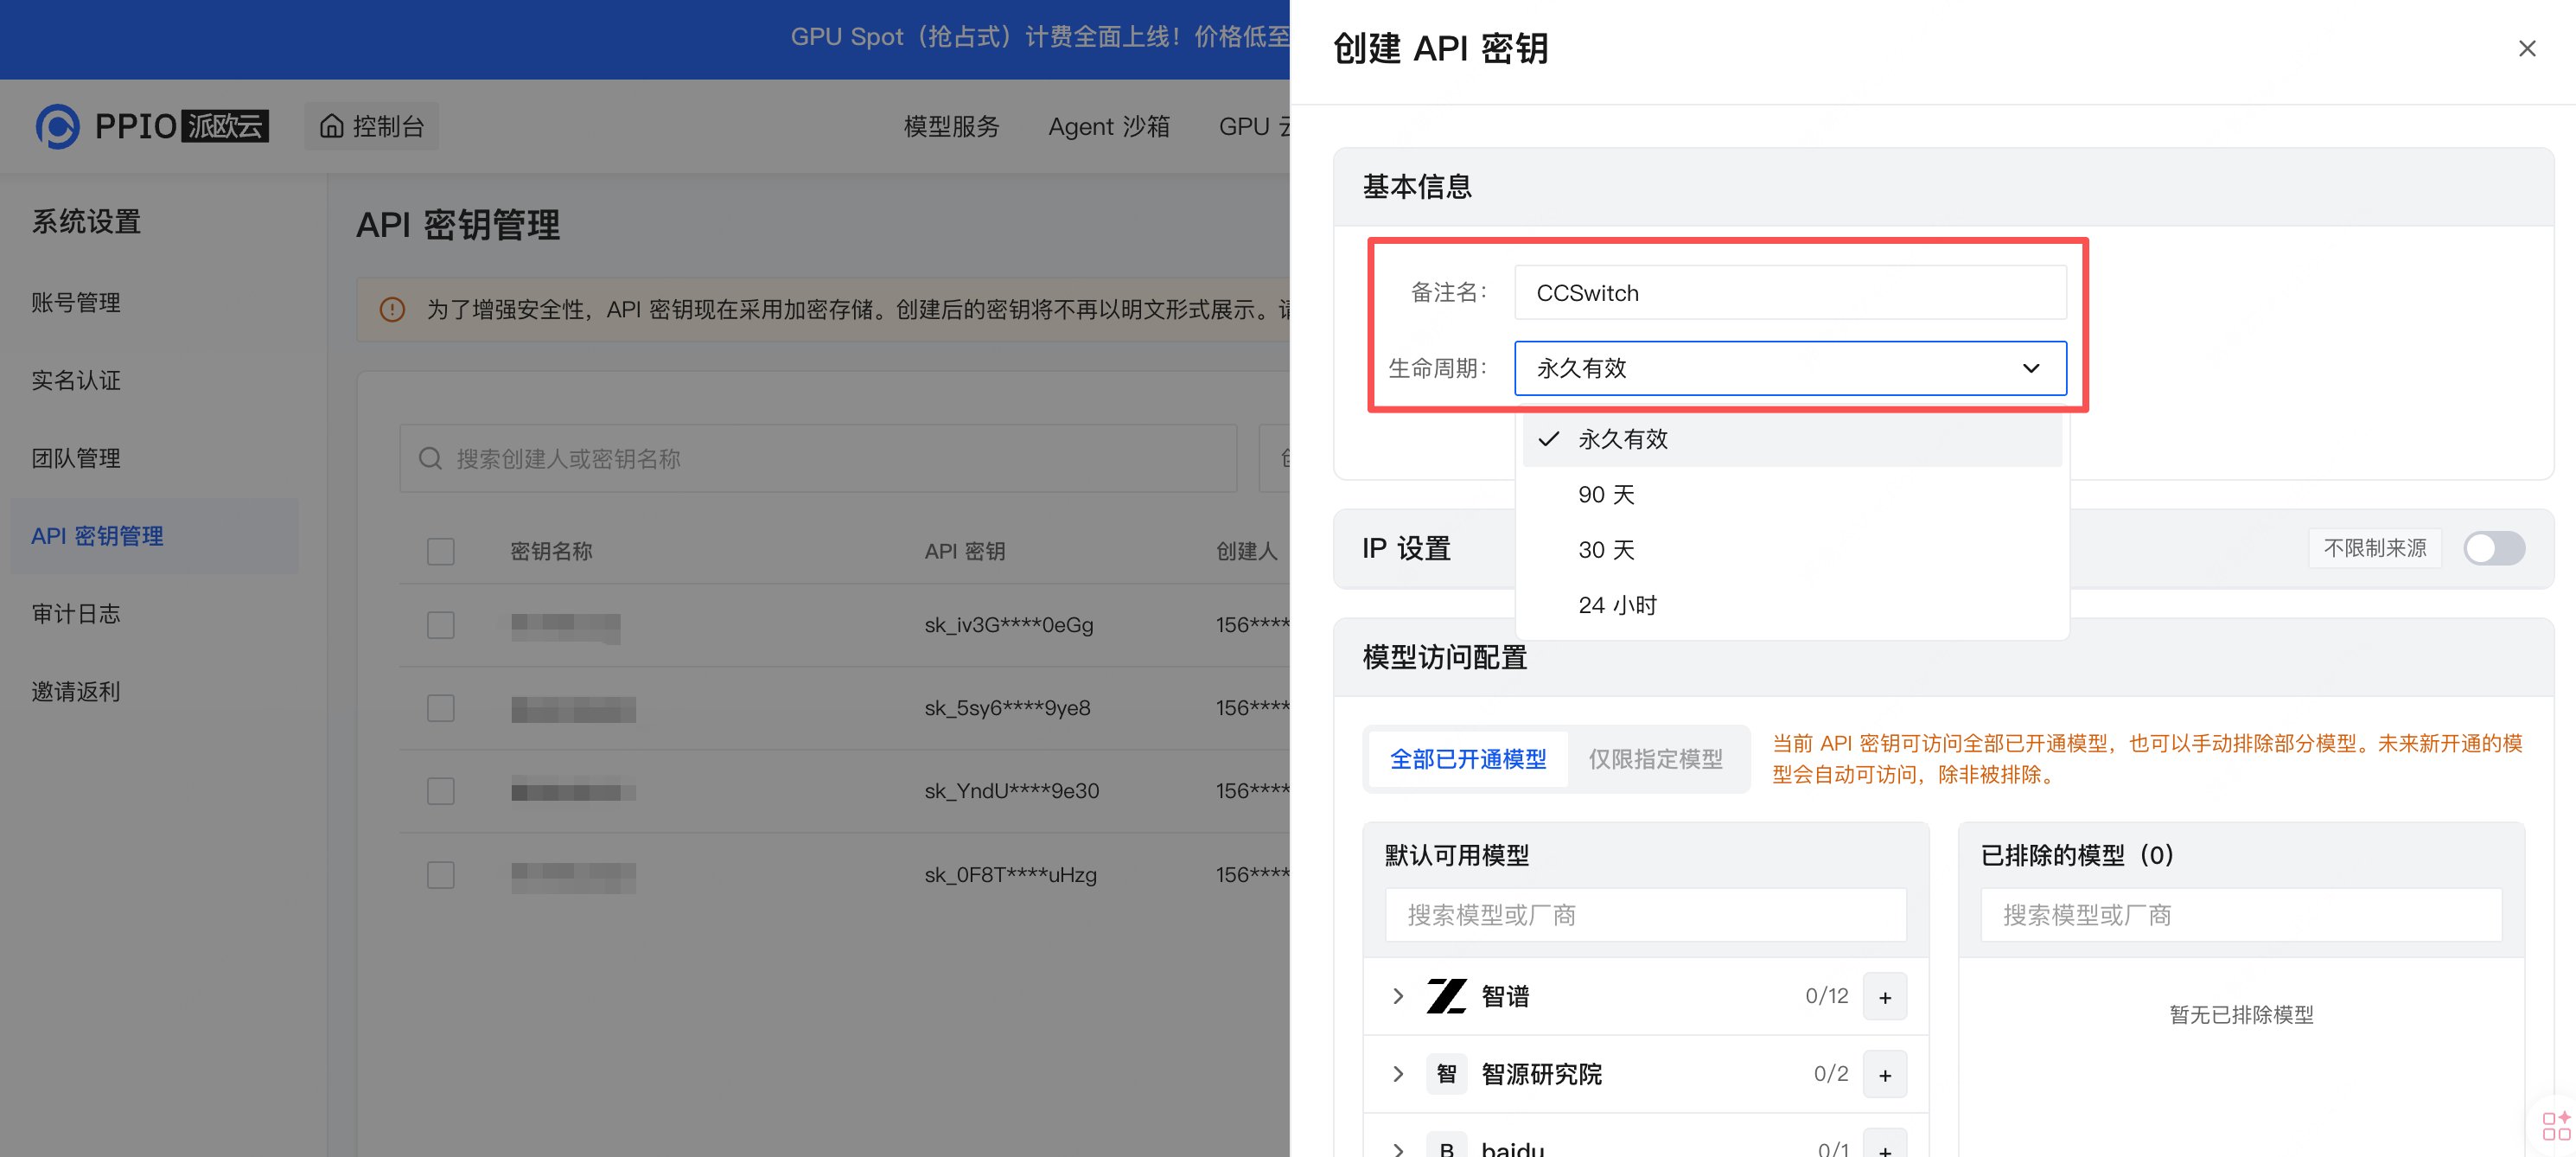
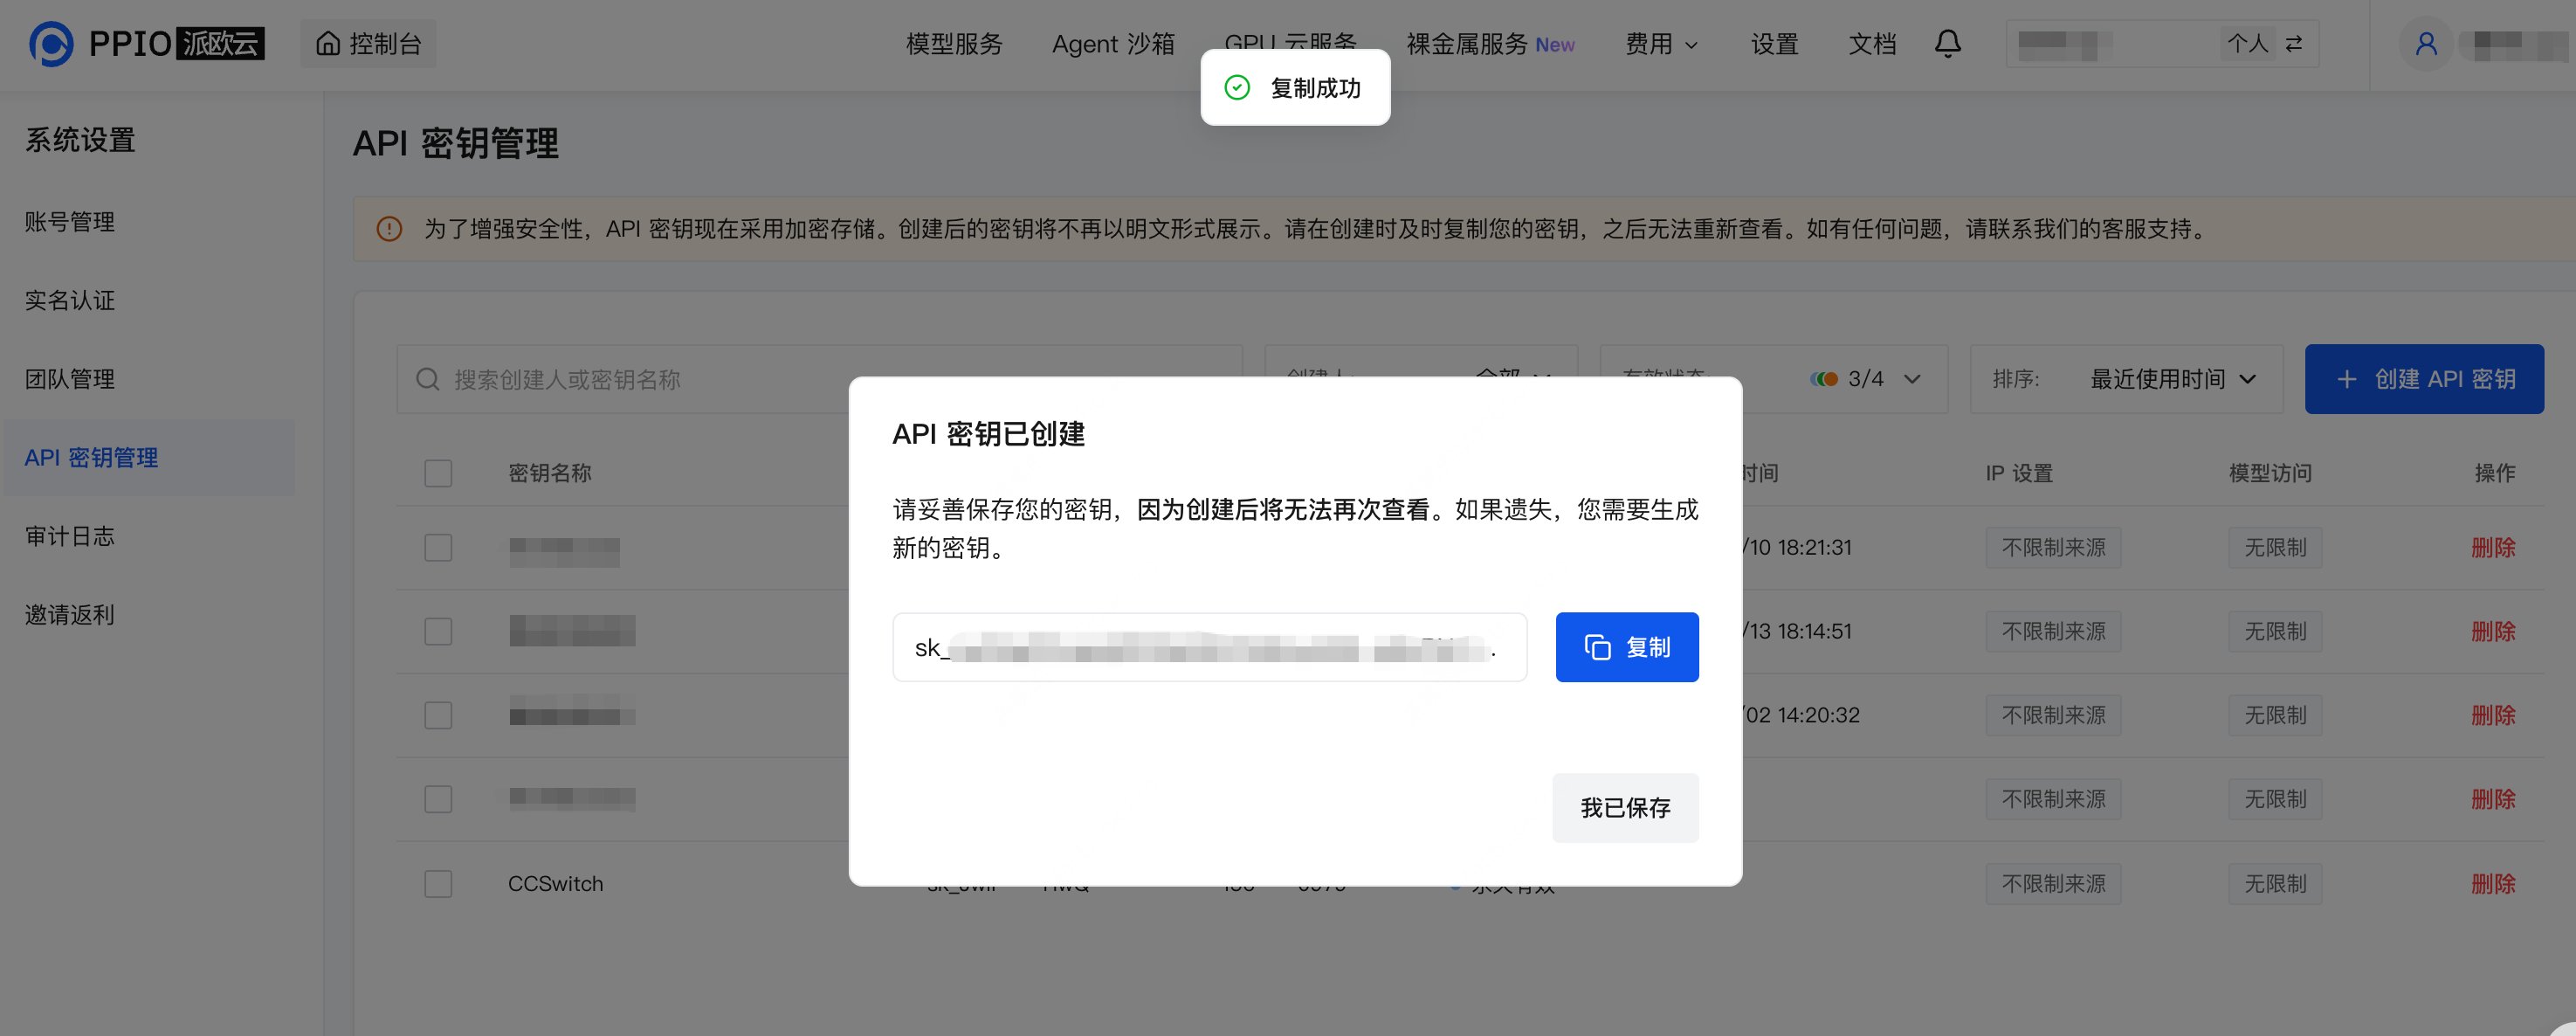
API Key 是在配置 CC Switch 时唯一需要手动输入的信息。获取 API key 需要先注册 PPIO 账号并登录(新用户填写邀请码【A7JKSR】还可以额外获得 5 元代金券),打开 [API 密钥管理页面](https://ppio.com/settings/key-management) 来点击创建。根据自身需求输入自定义密钥名称、选择生命周期时长,API 密钥即可创建成功。
注册地址:[https://ppio.com/](https://ppio.com/)
## 第一步,获取 PPIO 的 API key
API Key 是在配置 CC Switch 时唯一需要手动输入的信息。获取 API key 需要先注册 PPIO 账号并登录(新用户填写邀请码【A7JKSR】还可以额外获得 5 元代金券),打开 [API 密钥管理页面](https://ppio.com/settings/key-management) 来点击创建。根据自身需求输入自定义密钥名称、选择生命周期时长,API 密钥即可创建成功。
注册地址:[https://ppio.com/](https://ppio.com/)
 ## 第二步:安装 CC Switch
下面以 macOS 为例,更多安装方式可参考:[CC Switch GitHub](https://github.com/farion1231/cc-switch)
方式一:通过 Homebrew 安装(推荐)
```bash theme={null}
brew install --cask cc-switch
```
更新:
```bash theme={null}
brew upgrade --cask cc-switch
```
方式二:手动下载
手动安装下载 `CC-Switch-v{版本号}-macOS.dmg`。CC Switch macOS 版本已通过 Apple 代码签名和公证,可直接安装打开。
## 第三步,添加 PPIO 作为模型服务商
安装完成后打开主页面,我们以 Claude Code 为例,点击右侧 + 号添加新模型供应商。
## 第二步:安装 CC Switch
下面以 macOS 为例,更多安装方式可参考:[CC Switch GitHub](https://github.com/farion1231/cc-switch)
方式一:通过 Homebrew 安装(推荐)
```bash theme={null}
brew install --cask cc-switch
```
更新:
```bash theme={null}
brew upgrade --cask cc-switch
```
方式二:手动下载
手动安装下载 `CC-Switch-v{版本号}-macOS.dmg`。CC Switch macOS 版本已通过 Apple 代码签名和公证,可直接安装打开。
## 第三步,添加 PPIO 作为模型服务商
安装完成后打开主页面,我们以 Claude Code 为例,点击右侧 + 号添加新模型供应商。
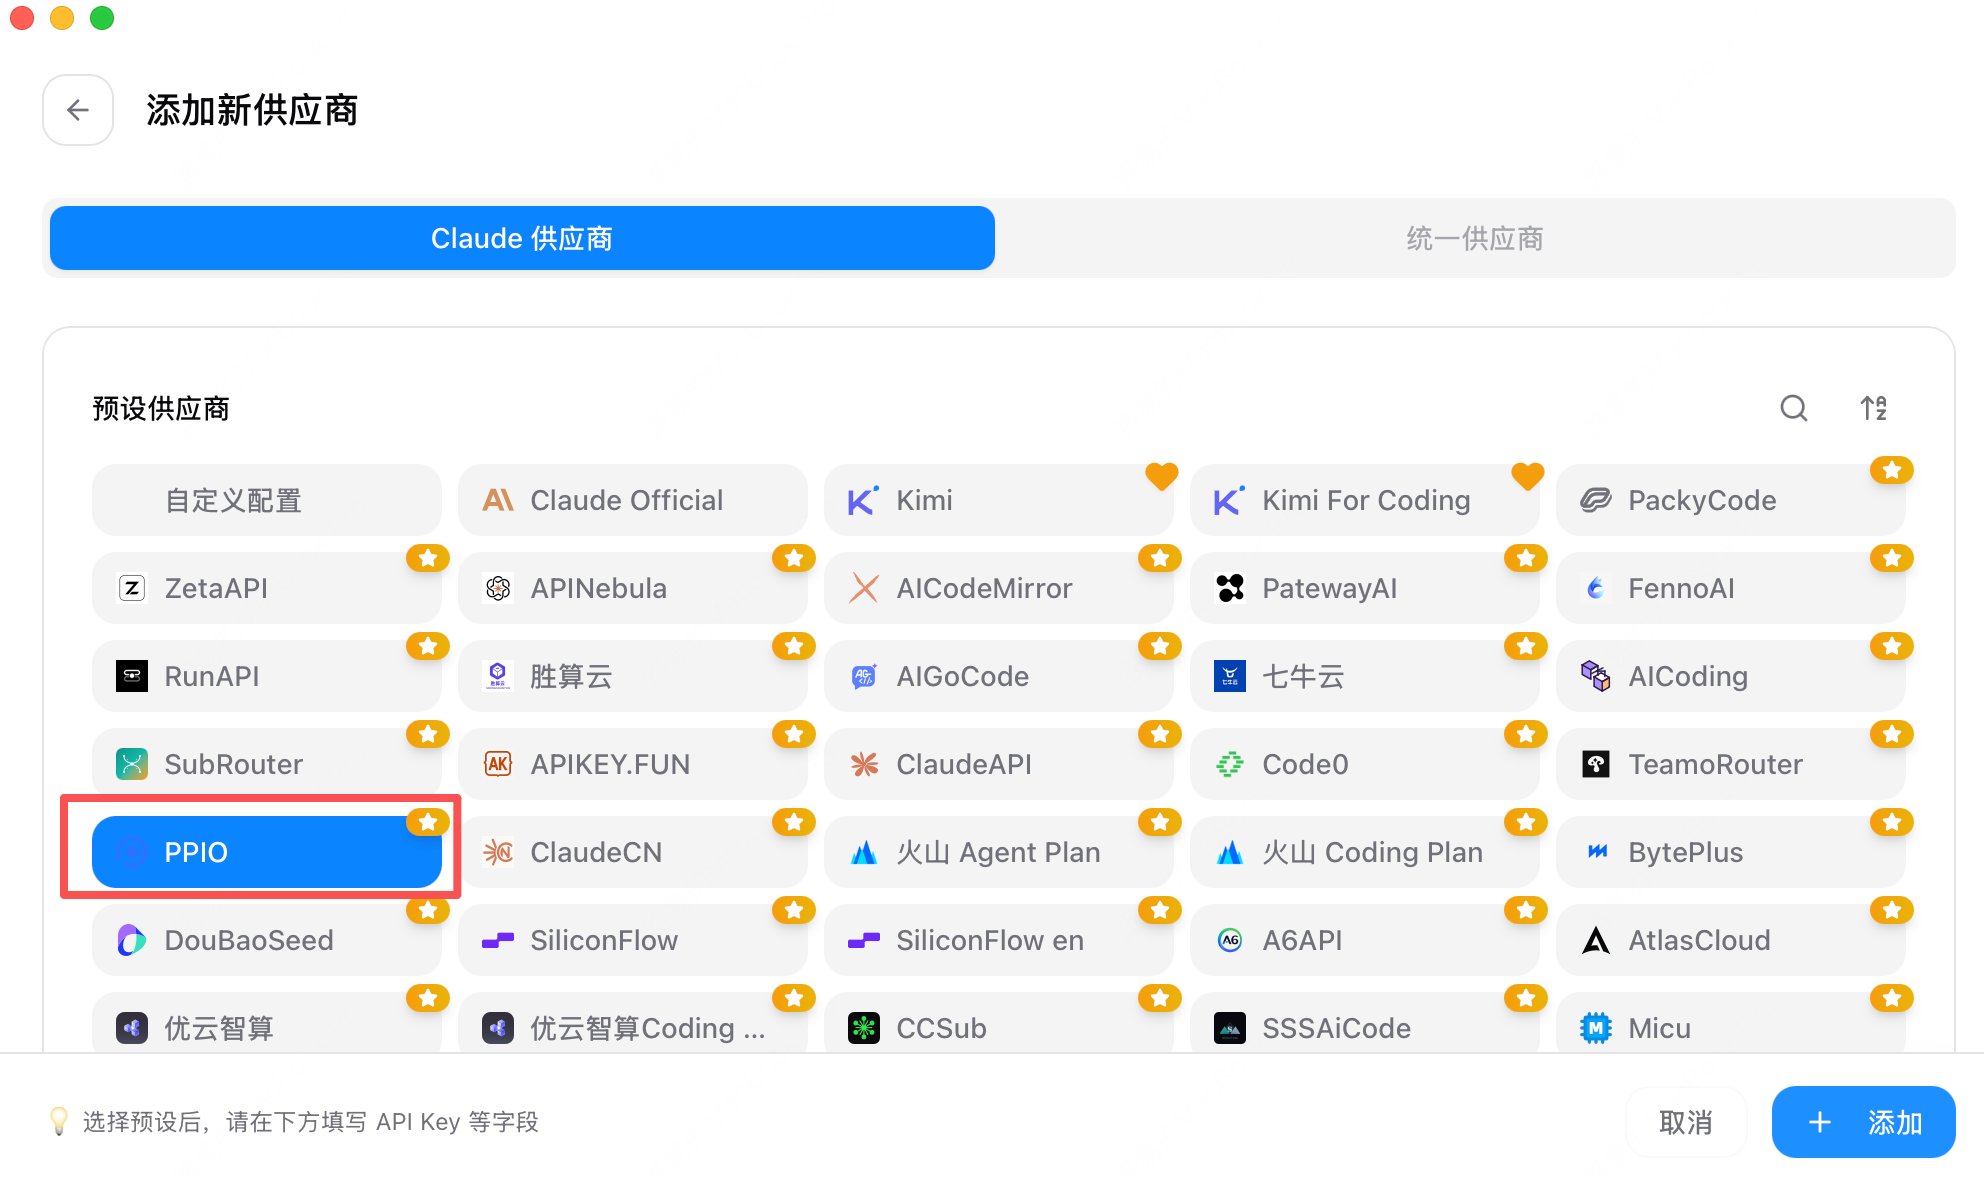
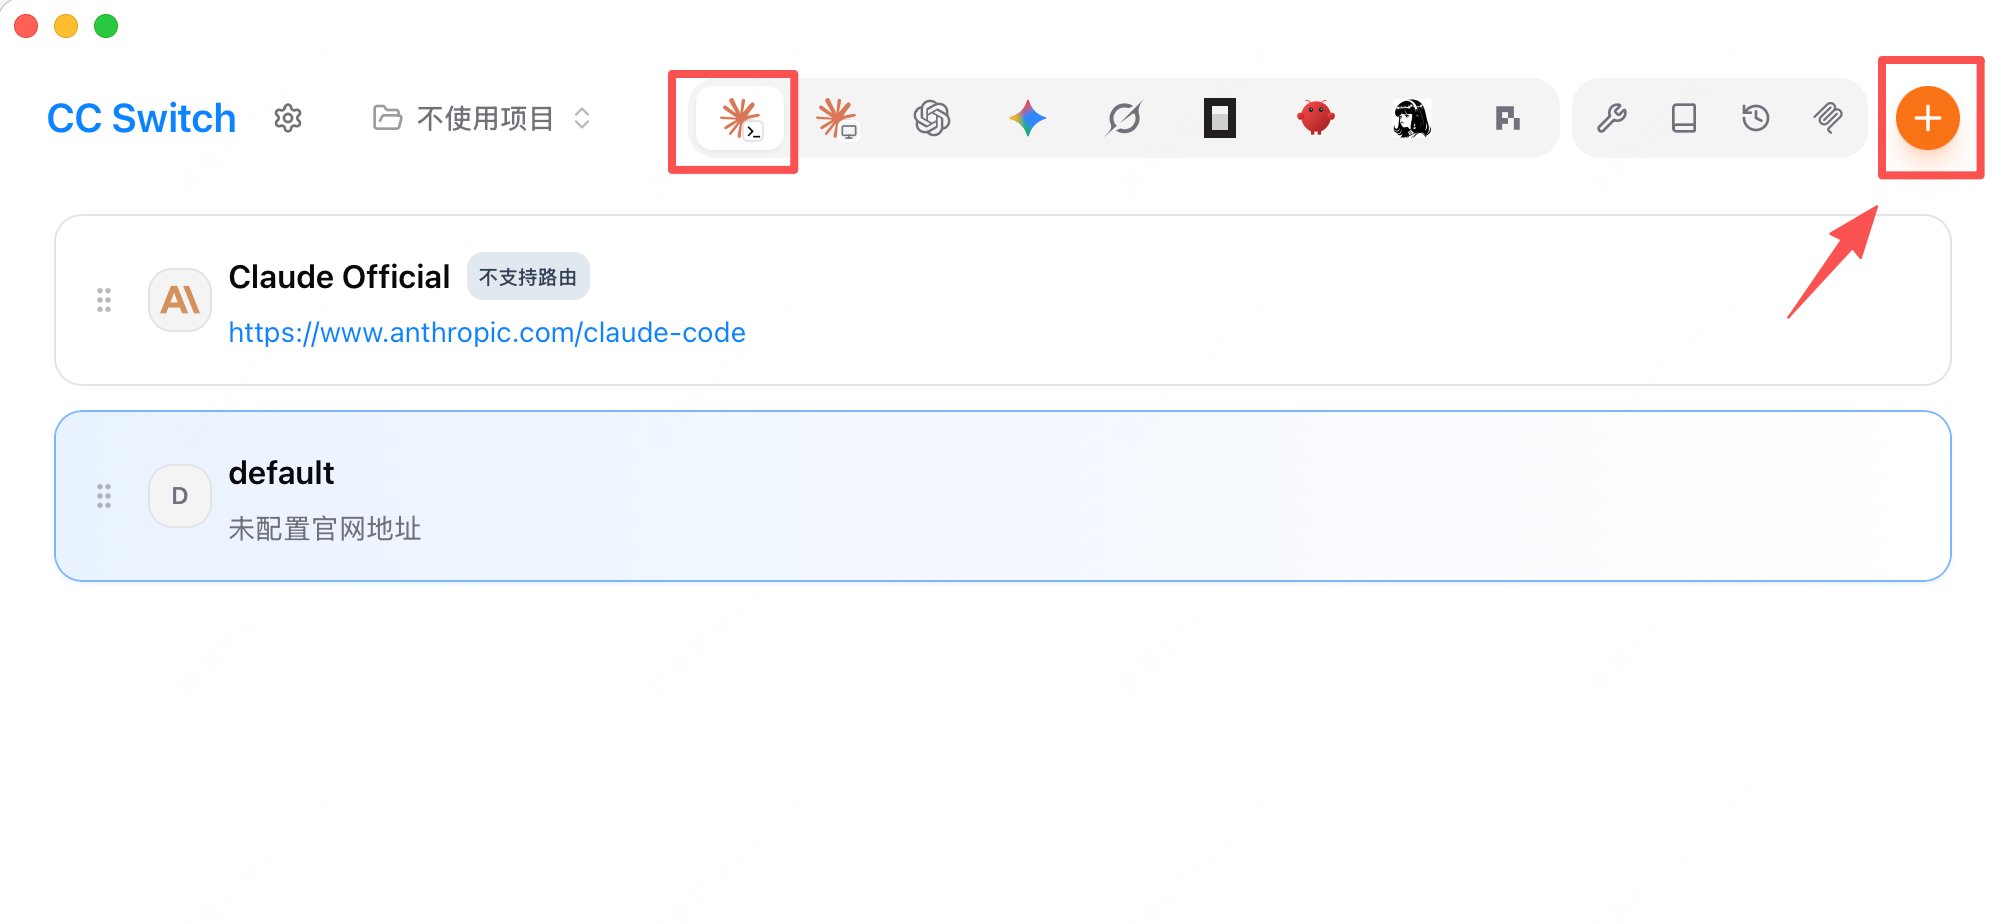 在预设供应商中选择 PPIO。
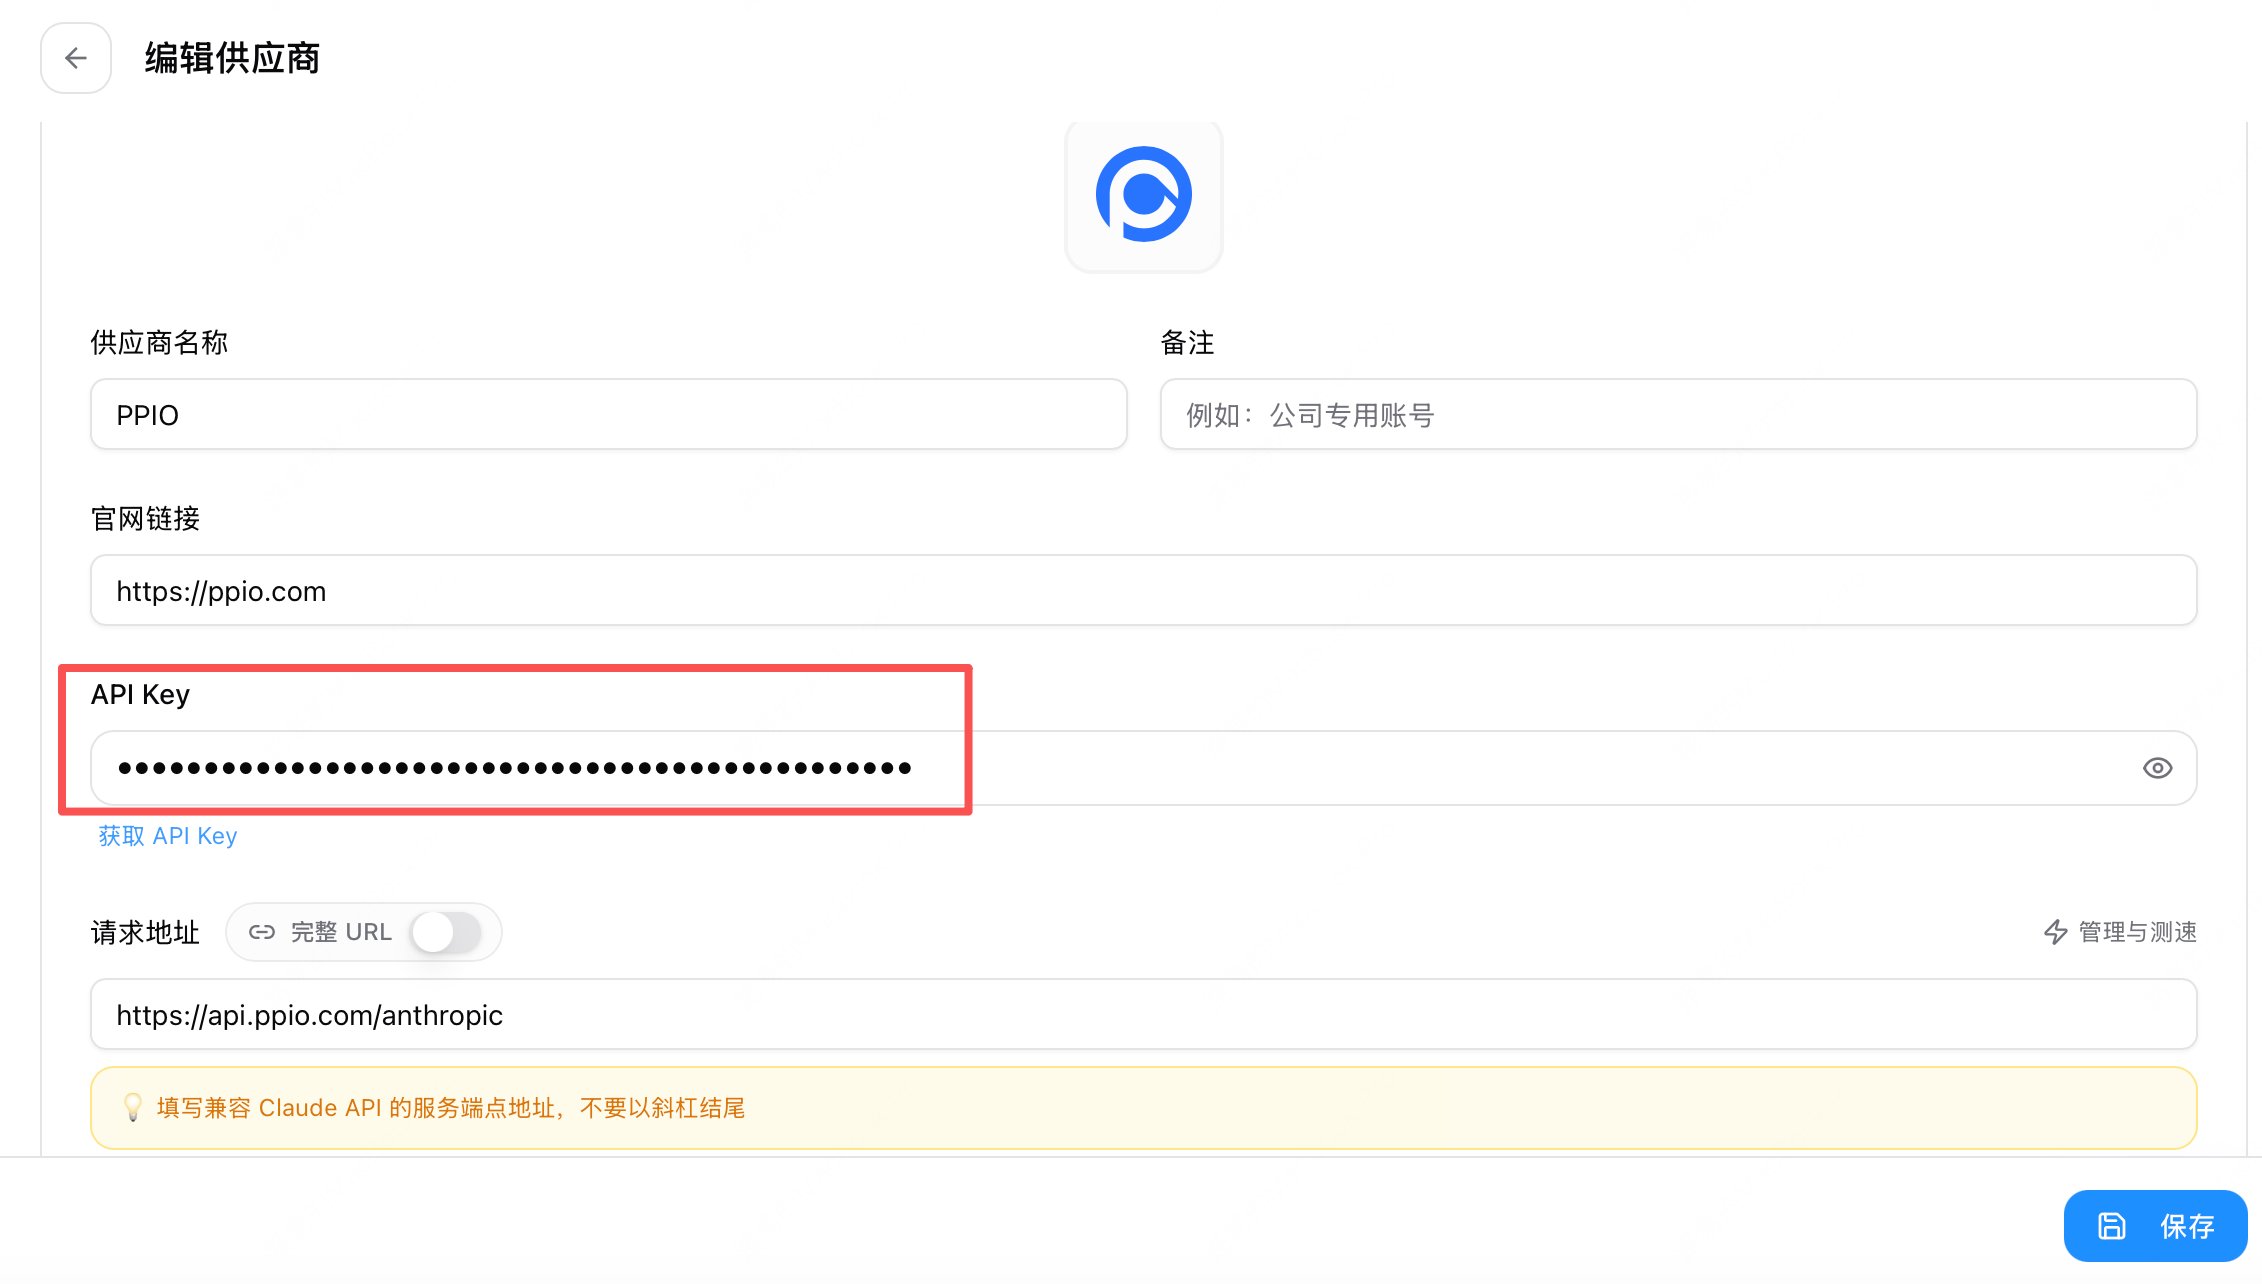
 然后将上一步创建的 API Key 填入即可,其他选项可以采用默认配置。
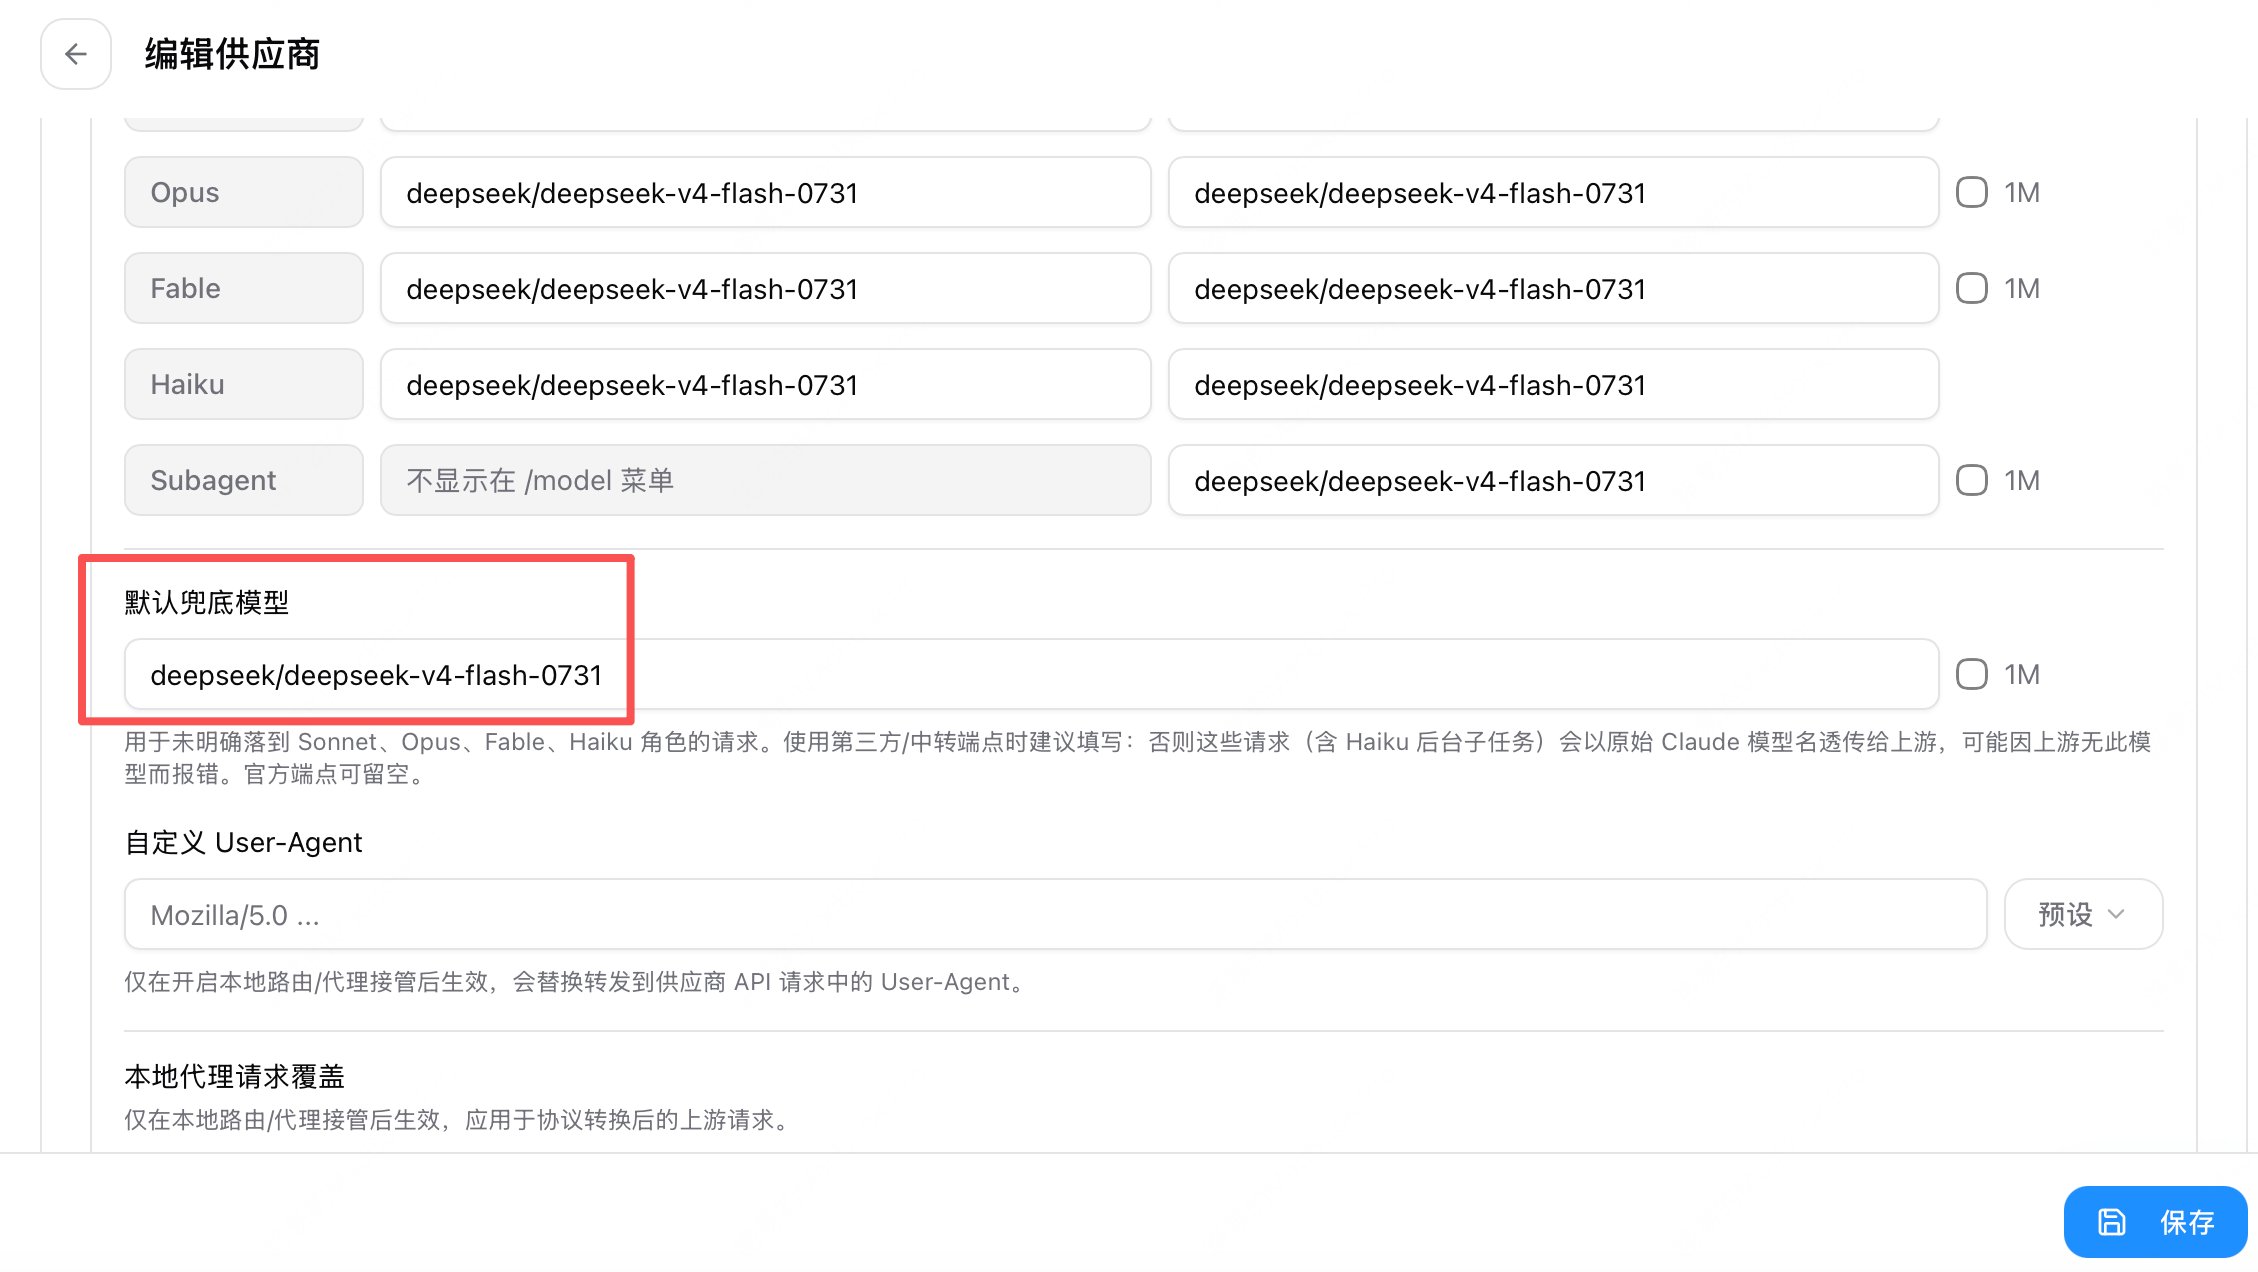
 PPIO 提供的默认模型为 `deepseek/deepseek-v4-flash-0731`,如果想要使用其他模型,将模型名称填入默认兜底模型来替换 `deepseek/deepseek-v4-flash-0731` 即可。PPIO 的模型名称可到模型广场查询。
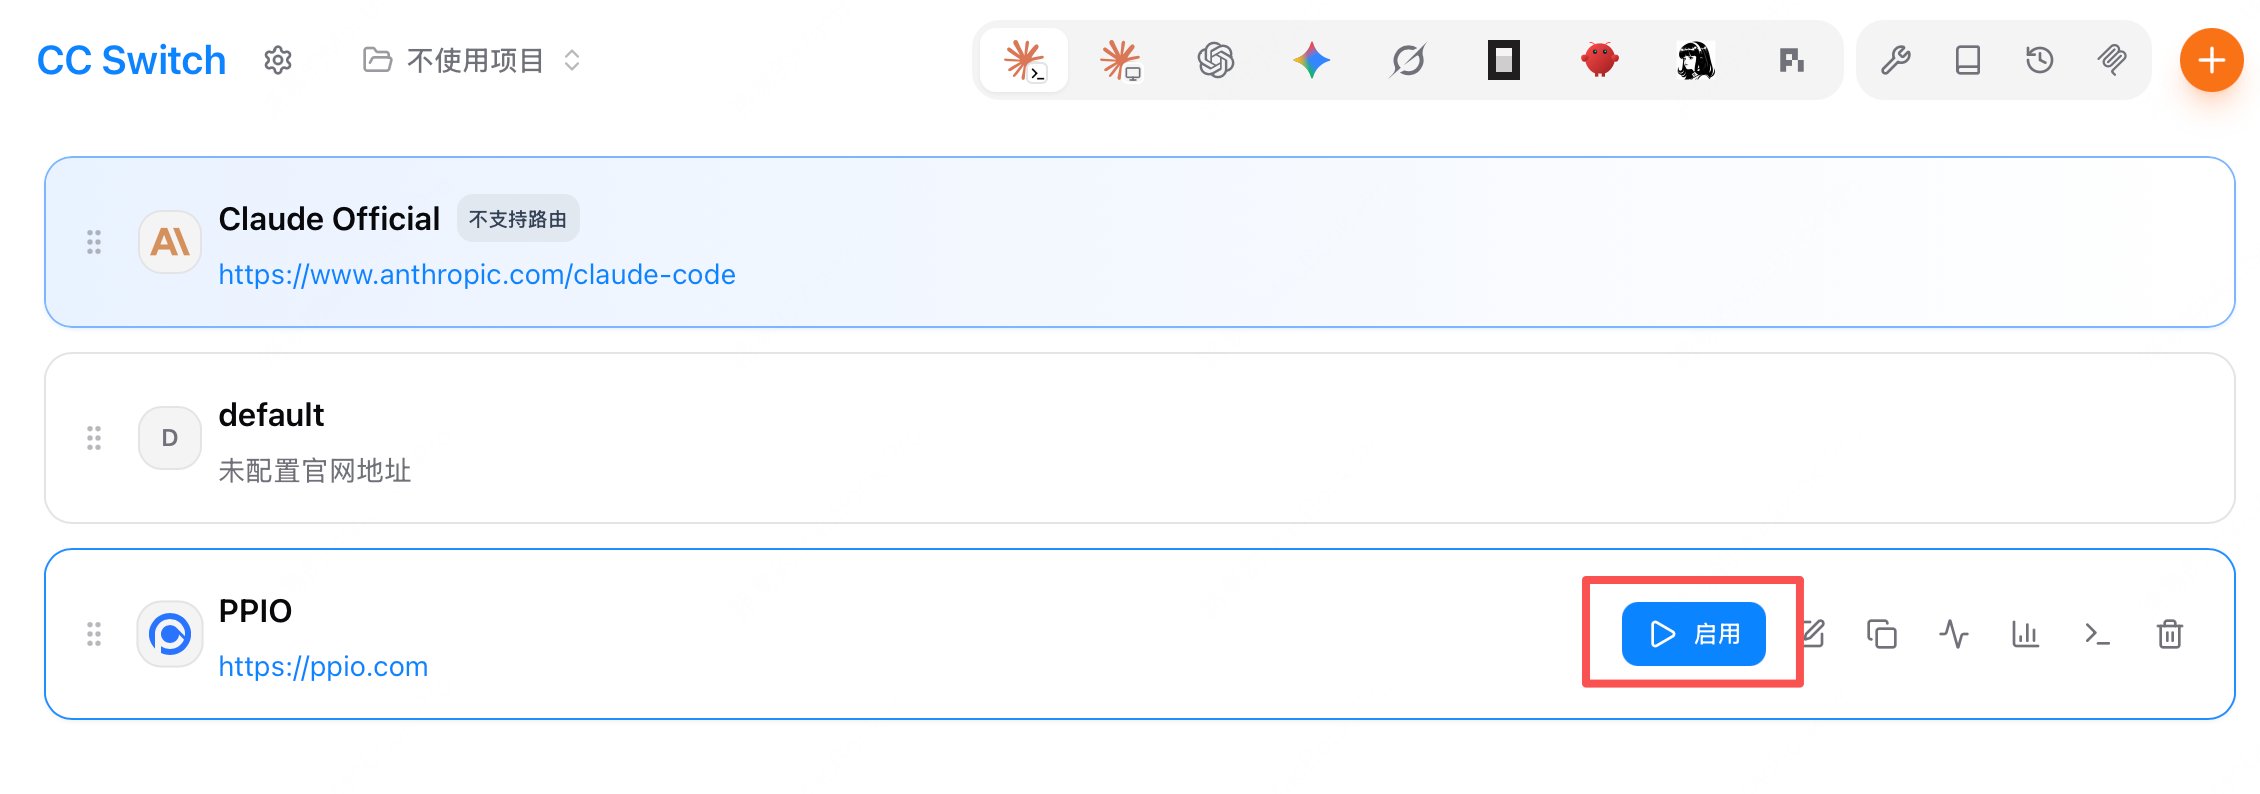
 添加完成之后选择保存,PPIO 的卡片会出现在主页面中,点击启用。
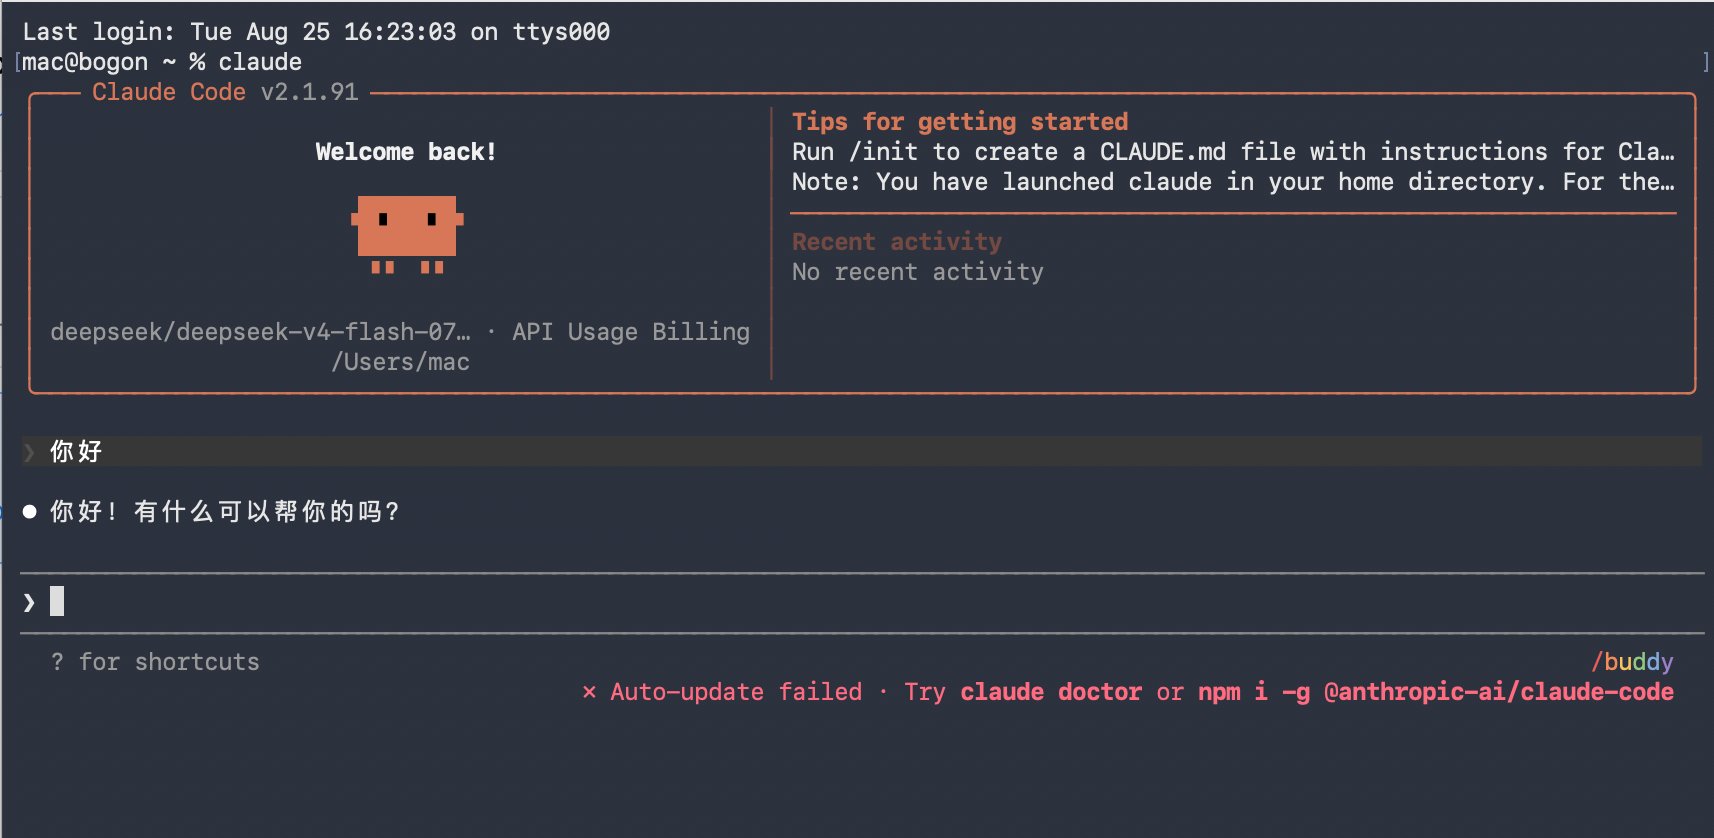
 我们打开 Claude Code 来验证配置,会看到模型名称已经切换为 `deepseek/deepseek-v4-flash-0731`。输入问题测试一下,若成功回复代表配置成功!
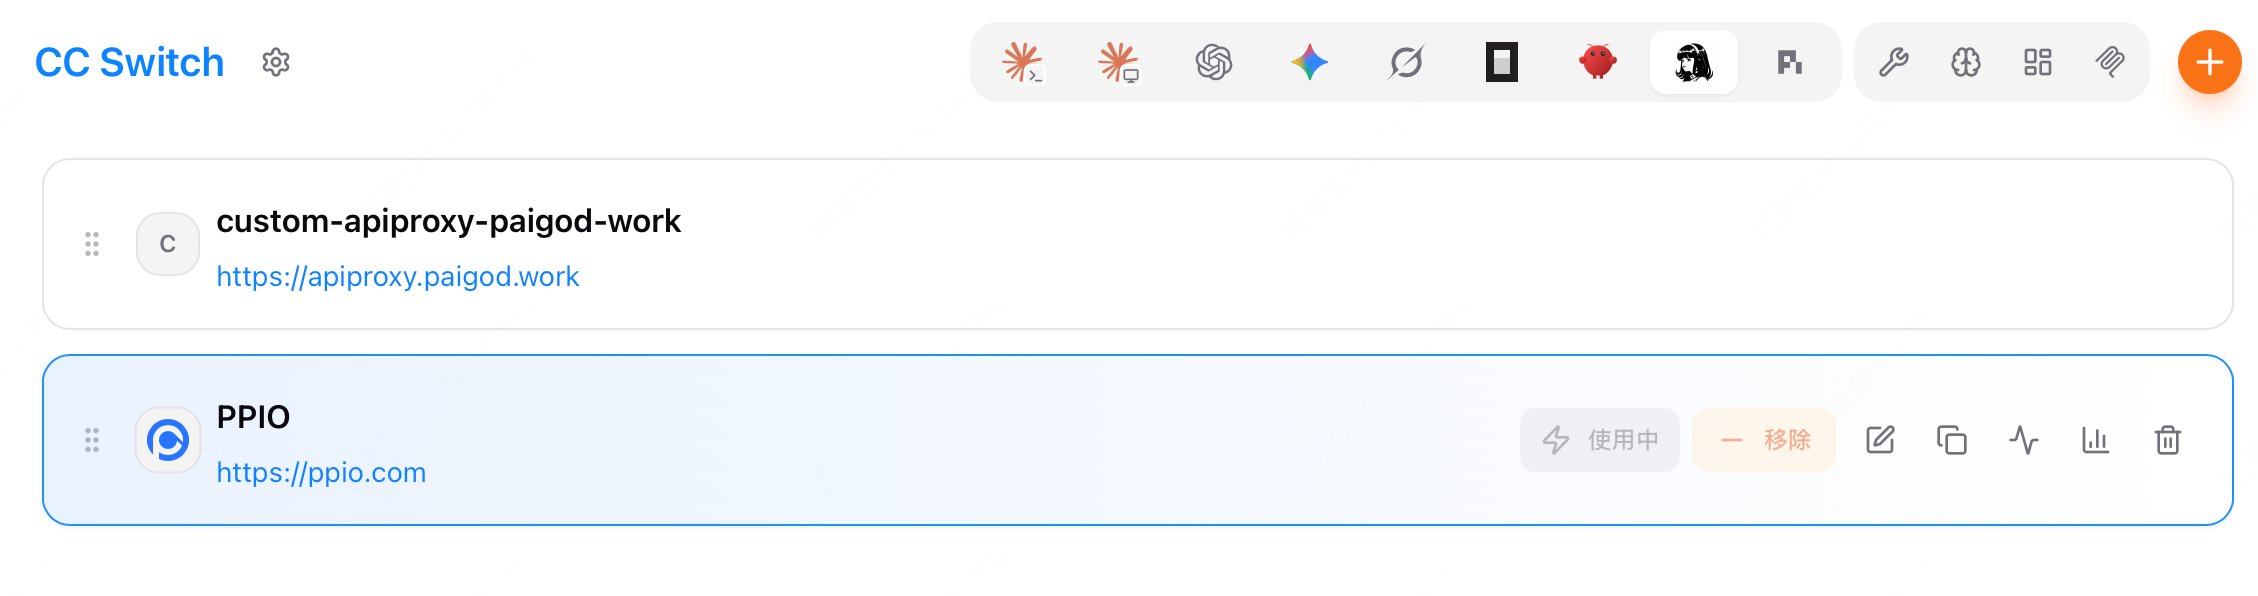
 除了 Claude Code 之外,PPIO 同时支持 Hermes Agent 等产品。只需要在顶部应用切换器中切换到 Hermes,点击 + 按钮,在预设中选择 PPIO(已自动处理 API 格式差异),粘贴同一个 API Key,就可以在 Hermes 中一键切换 PPIO 模型了。
 五分钟,一次配置,从此告别手动改 JSON 的日子。CC Switch 负责让切换变简单,PPIO 负责让成本降下来。
如果你已经用上了其他更好玩的组合(比如 PPIO + Codex、Gemini CLI),也欢迎分享你的玩法。
作为国内领先的独立 Agentic Cloud 服务商,PPIO 在 2026 年 7 月的日均 Token 调用量达 2.2 万亿,持续为用户提供可靠、可扩展、高性价比的模型服务。
五分钟,一次配置,从此告别手动改 JSON 的日子。CC Switch 负责让切换变简单,PPIO 负责让成本降下来。
如果你已经用上了其他更好玩的组合(比如 PPIO + Codex、Gemini CLI),也欢迎分享你的玩法。
作为国内领先的独立 Agentic Cloud 服务商,PPIO 在 2026 年 7 月的日均 Token 调用量达 2.2 万亿,持续为用户提供可靠、可扩展、高性价比的模型服务。